Hanko Microsoft OAuth Integration Guide:About Hanko:Hanko is a modern open source authentication solution and the fastest way you integrate passkeys, 2FA, SSO, and more—with full control over your data. Move between self-hosted and Hanko Cloud anytime. No lock-in. Just Auth how it should be: secure, user friendly, and fully yours.What This Guide Covers: This guide demonstrates how to integrate Microsoft OAuth authentication with Hanko, allowing users to sign in using their Microsoft accounts (including personal, work, or school accounts). You’ll learn to create an Azure application registration, configure Microsoft Entra ID, and implement Microsoft authentication in your application.Key Technologies:
- OAuth 2.0 and OpenID Connect protocols
- Microsoft Entra ID (formerly Azure Active Directory)
- Azure Application Registration
- JWT (JSON Web Tokens) for secure session management
- Microsoft Graph API integration
- Active Hanko Cloud account with a configured project
- Microsoft Azure account for application registration
- Basic understanding of OAuth 2.0 authentication flow
- Understanding of Azure multi-tenant applications
- Create and configure an Azure application registration
- Set up multi-tenant authentication with proper account type selection
- Generate client secrets and configure redirect URLs
- Configure optional claims for enhanced security (UPN, email verification)
- Configure Microsoft OAuth credentials in Hanko Console
- Implement Microsoft authentication in your frontend application
Prerequisites
- You need a Hanko Cloud account and a project. Learn more on how to set them up here.
- You need a Microsoft Azure account. You can create account here.
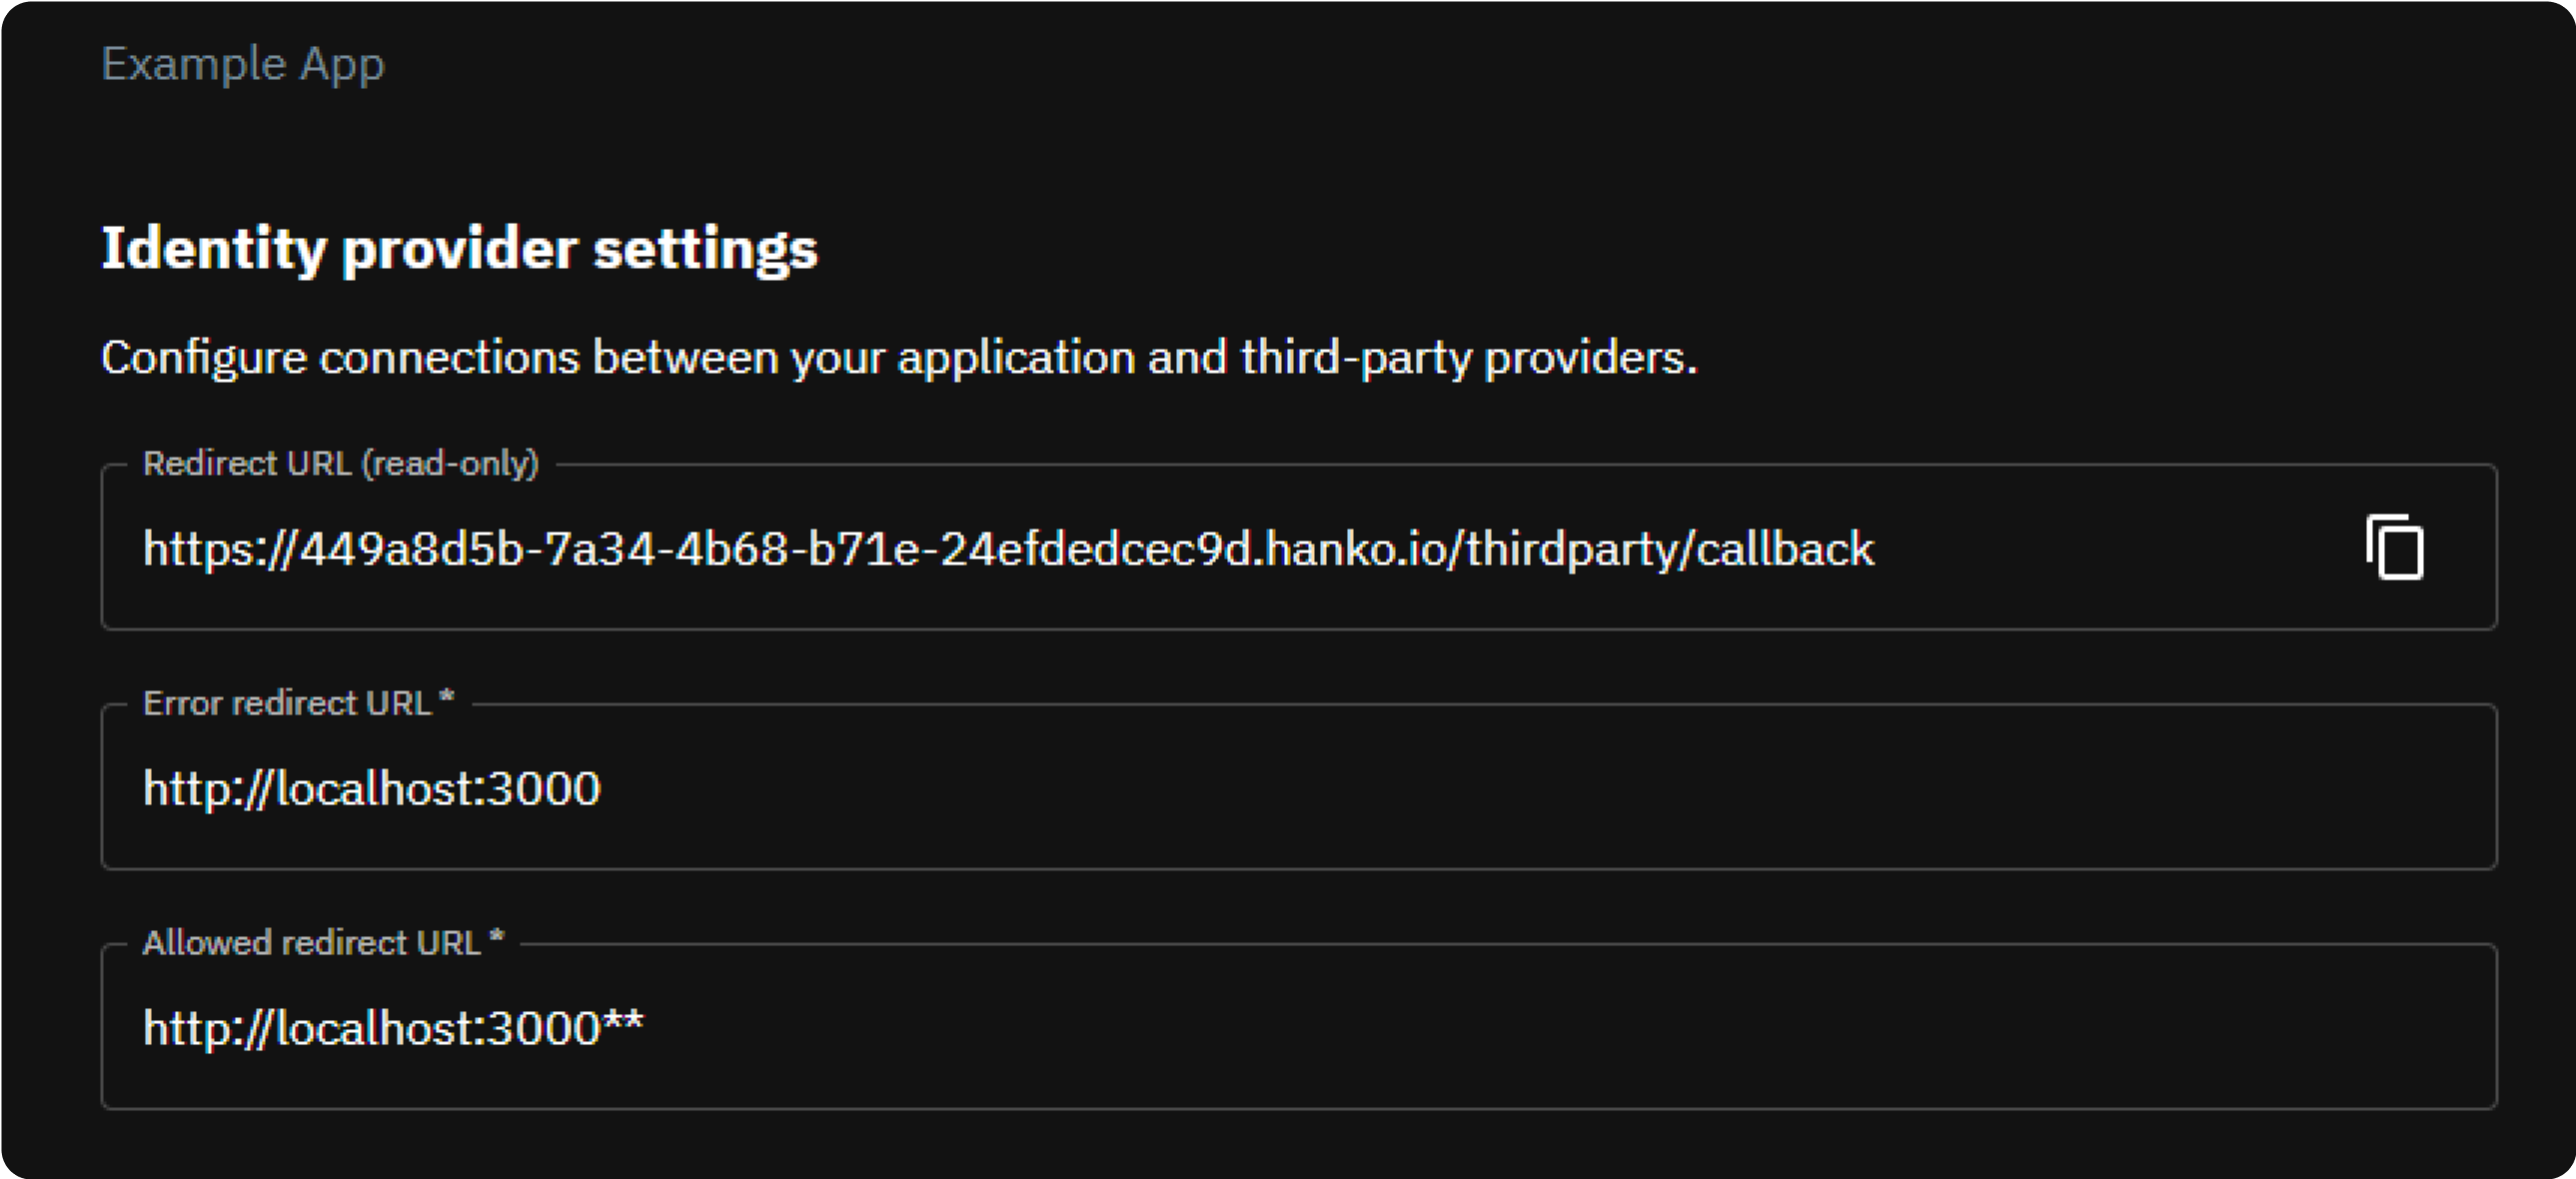
Get your provider redirect URL
When creating an Azure Application, you need to provide a redirect URL that determines where the third party provider redirects after a successful login. This redirect URL consists of the base URL of the Hanko API and the/thirdparty/callback endpoint. You can always view your redirect URL in the Hanko Cloud Console:
- Sign in to cloud.hanko.io.
- Select your
Organization. - Select your
Project. - In the left sidebar, click
Settings, then selectIdentity providers. - Find your redirect URL in the
Redirect URLinput.
Create a new Azure application
- Navigate to and sign in to the Azure portal.
- Click the hamburger menu in the navbar in the top left.
- Select
Microsoft Entra ID.

- Select
App registrationsin the left sidebar.
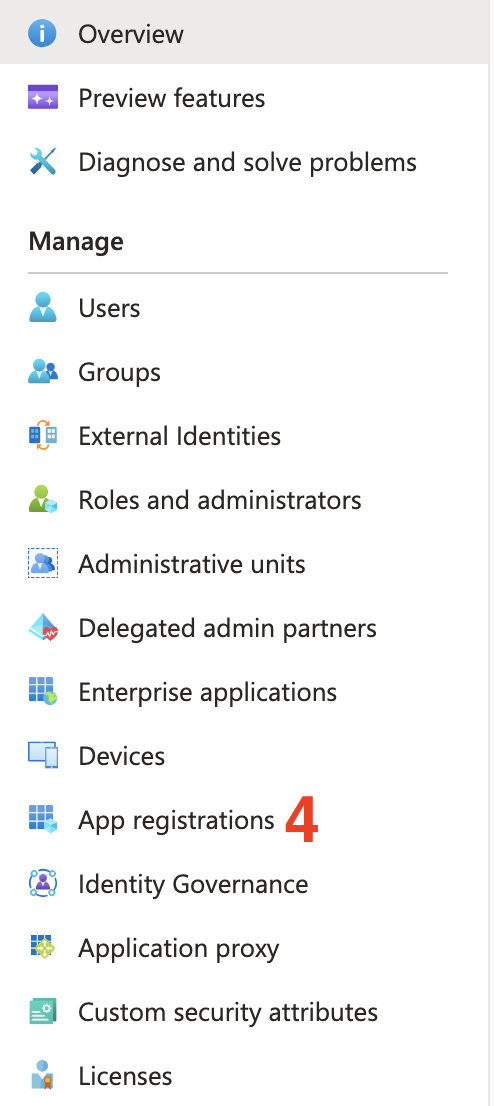
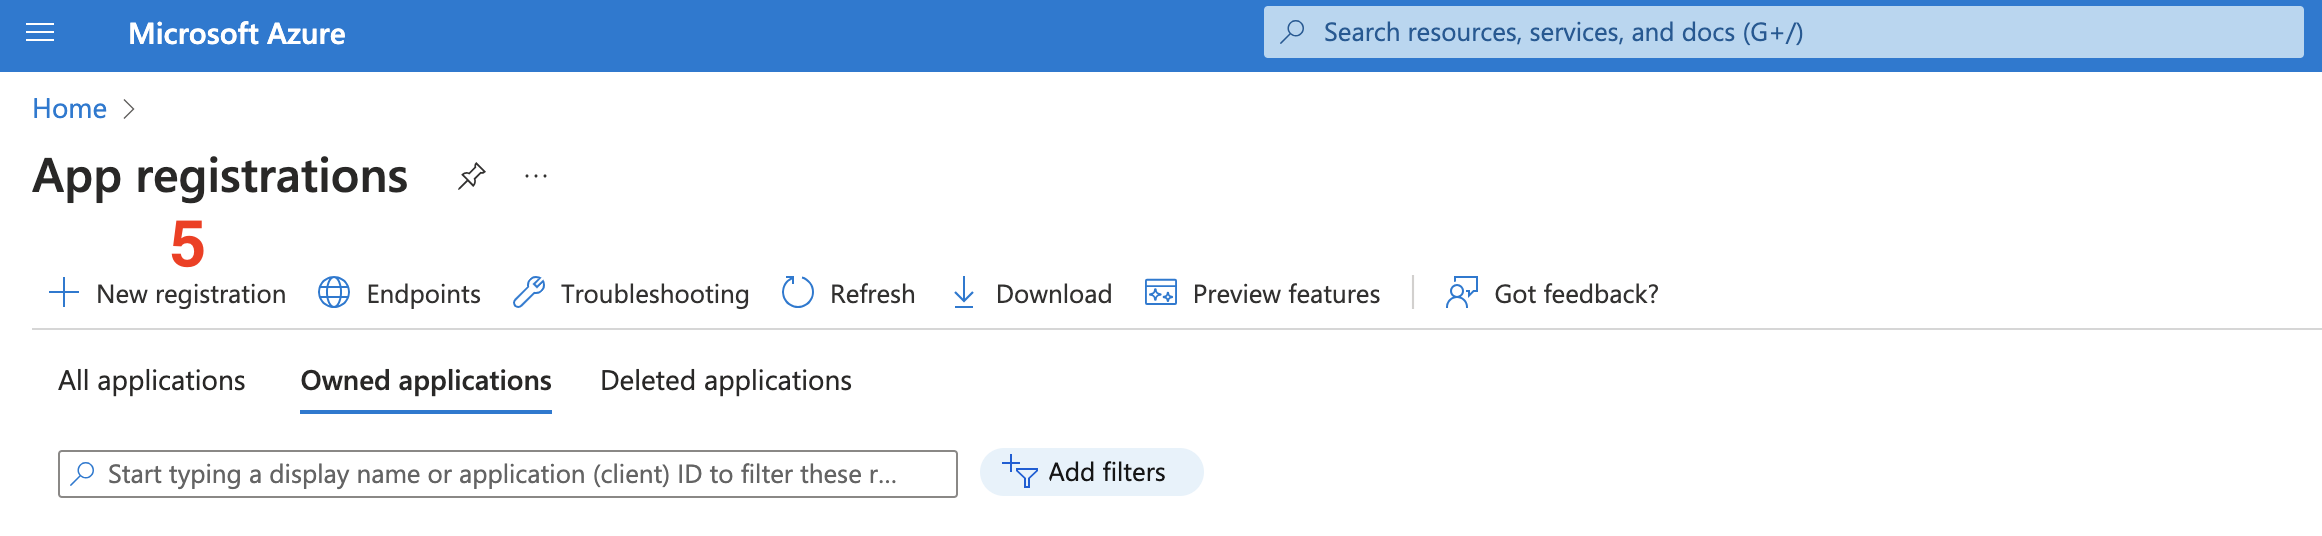
- On the top left, click on
New registration.
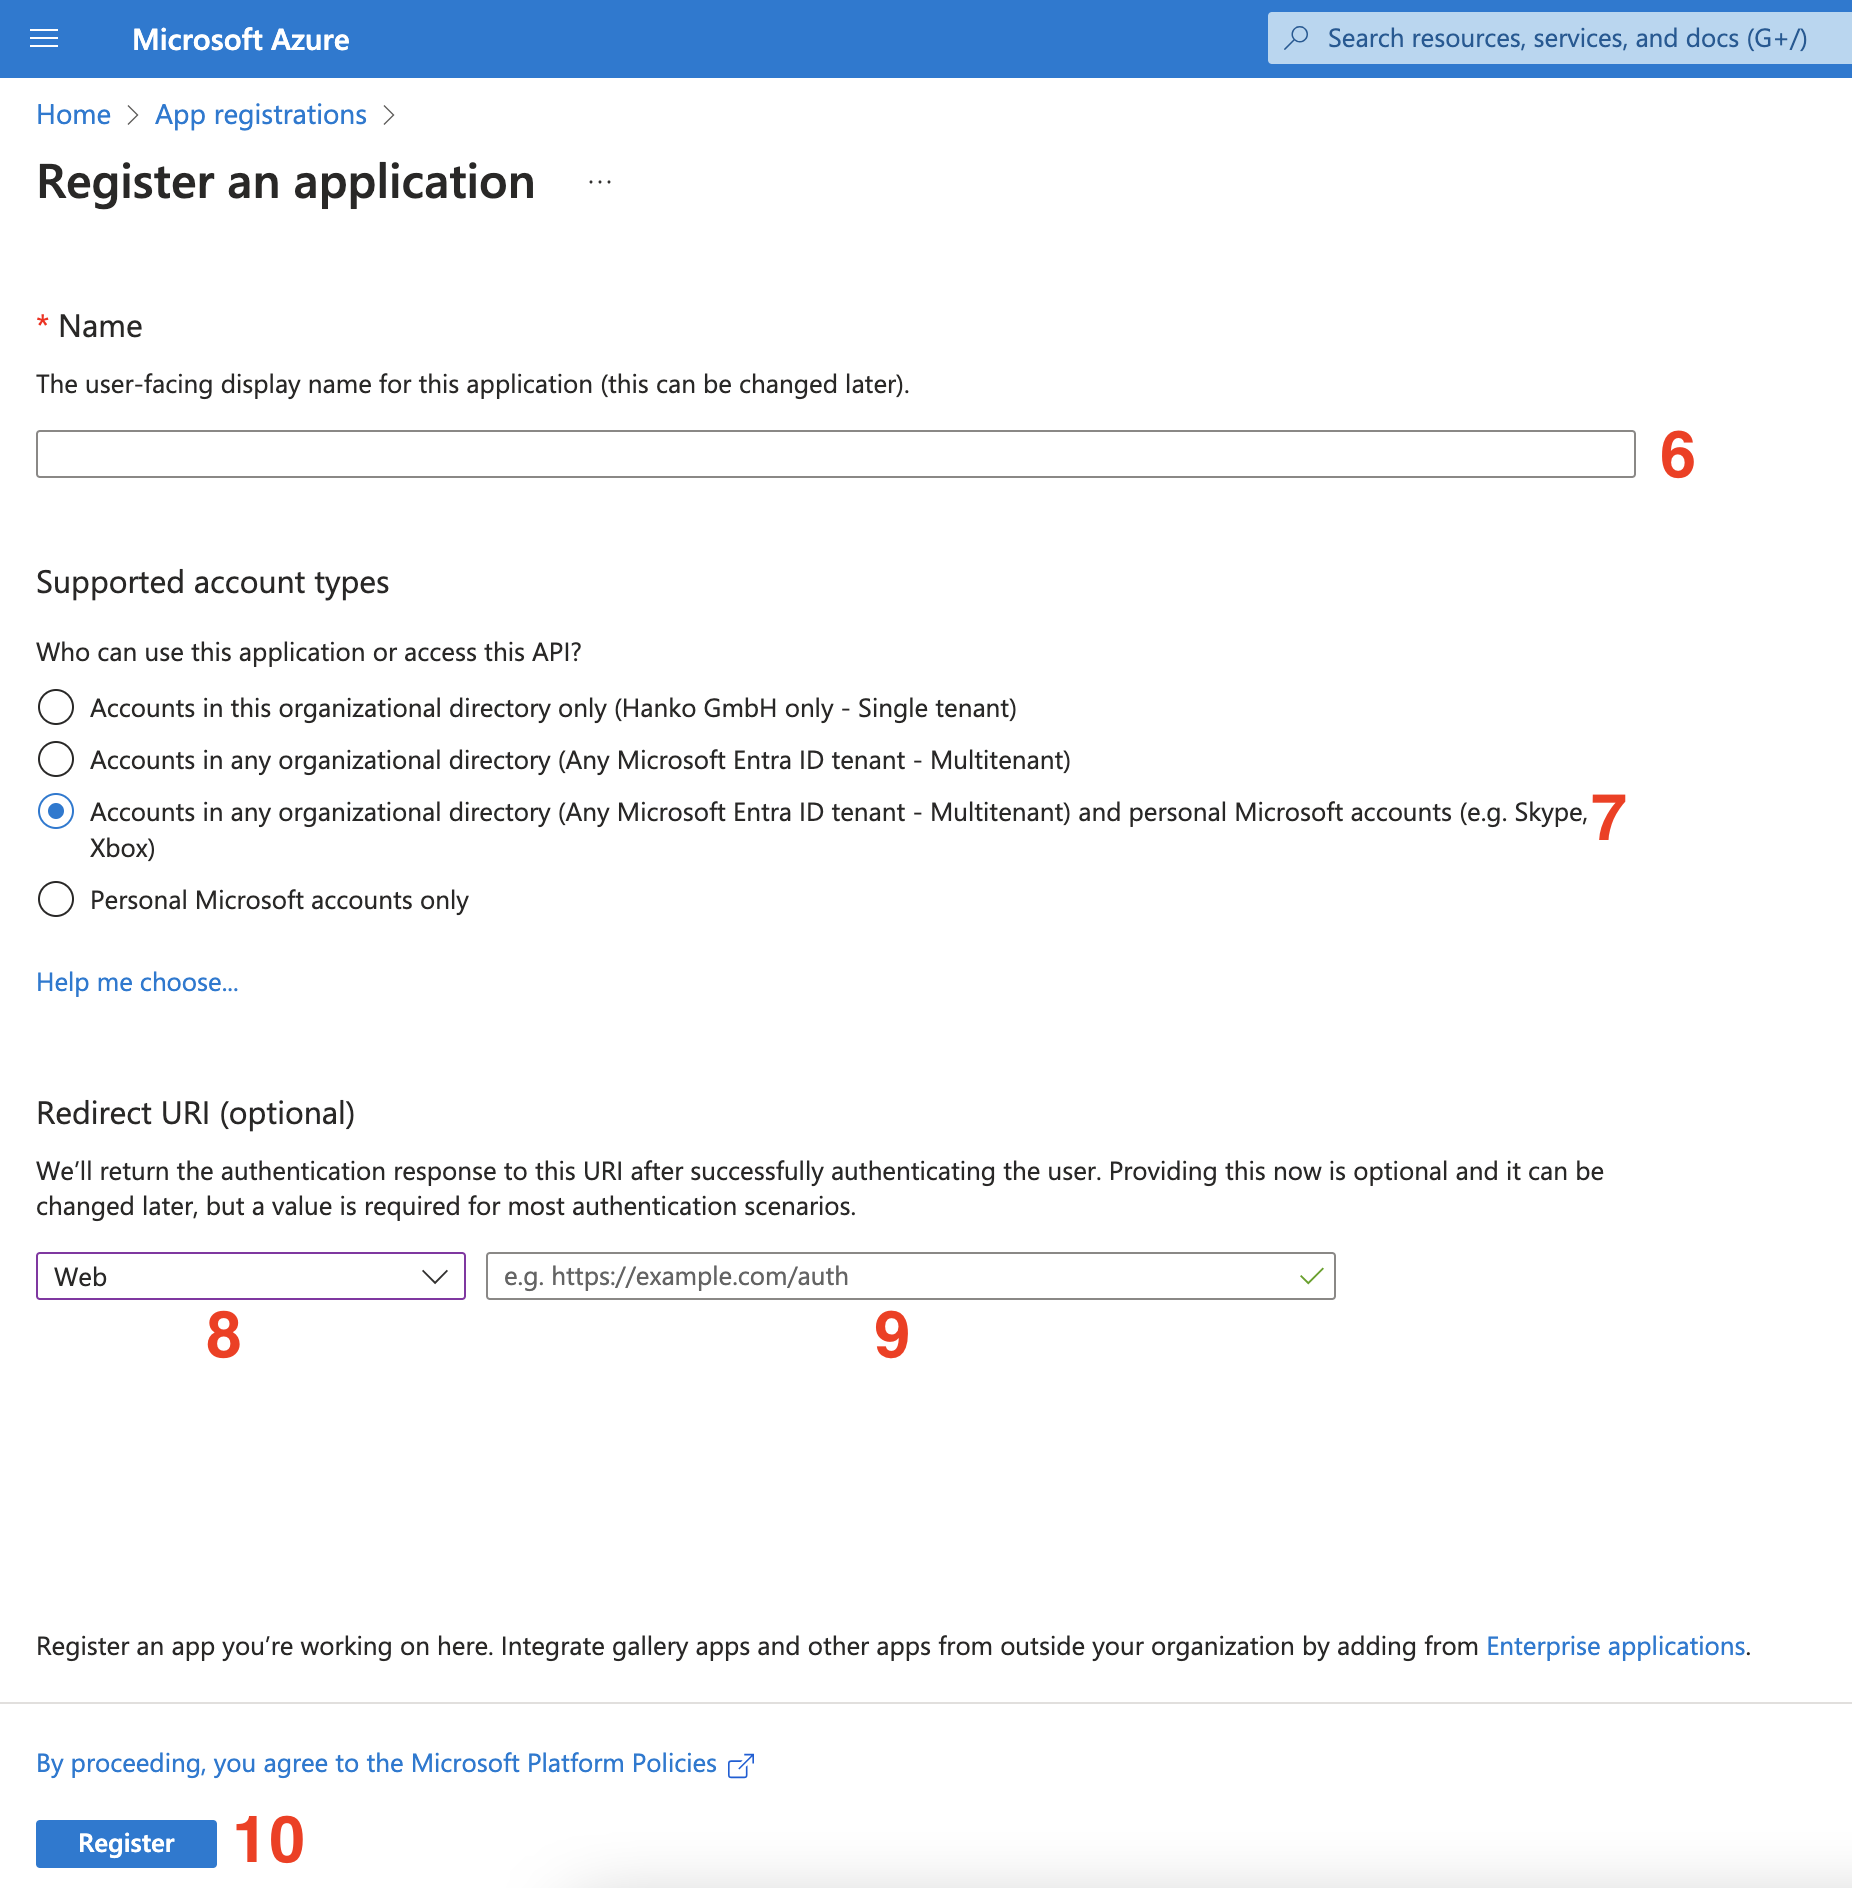
- Enter your Application name.
- Under
Supported account typeschoose the third option:Accounts in any organizational directory (Any Azure AD directory - Multitenant) and personal Microsoft accounts (e.g. Skype, Xbox). - Under the
Redirect URIsection selectWebas the platform. - Enter the
Redirect URLyou obtained in the first step as the value. - Click on
Register.
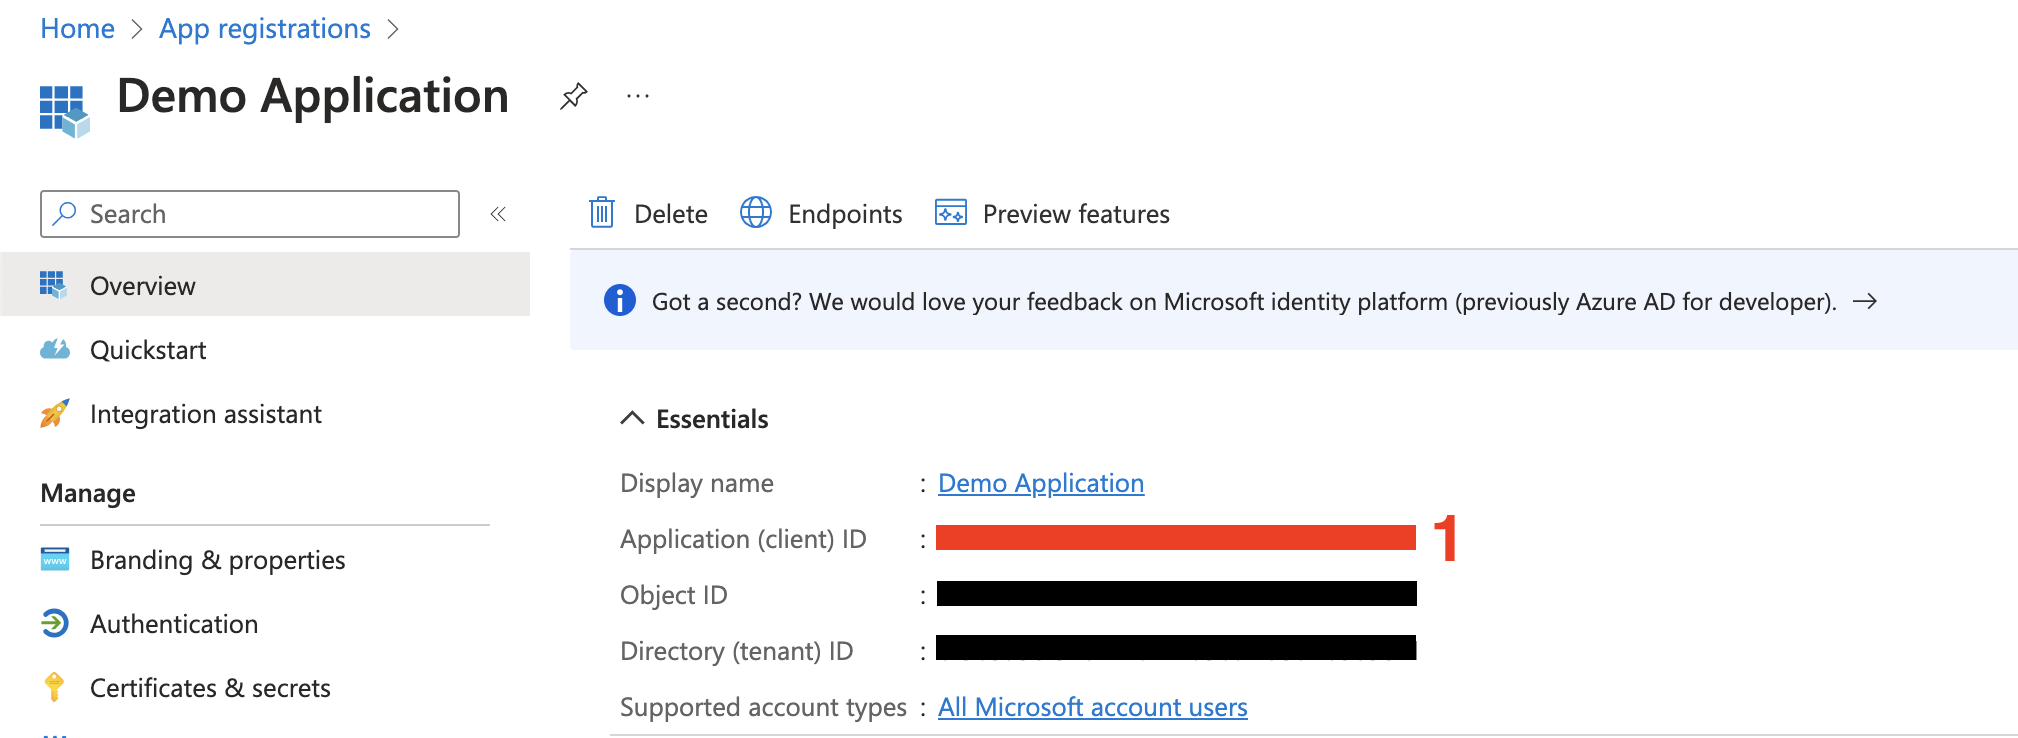
Get your client ID and secret
Next, you need to obtain your client ID and client secret.- You can view the client ID of your app in the
Essentialssection on theOverviewpage (Application (client) ID) of your application/app registration. You will need this when configuring your credentials with Hanko
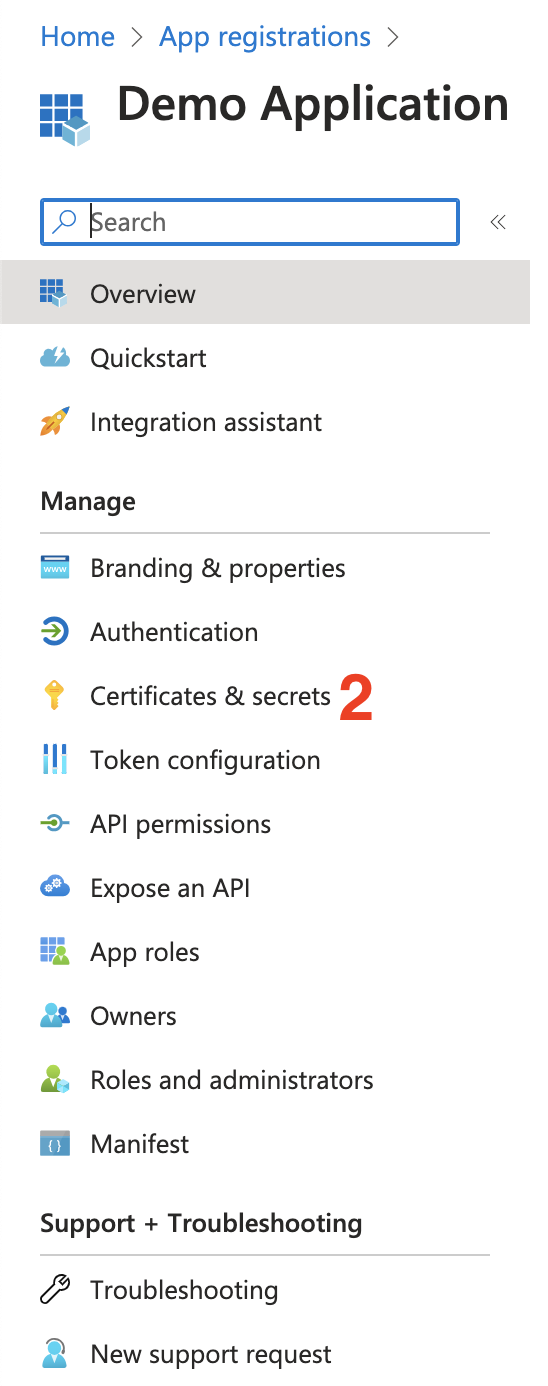
- To create a client secret, select
Certificates & Secretsin the sidebar.
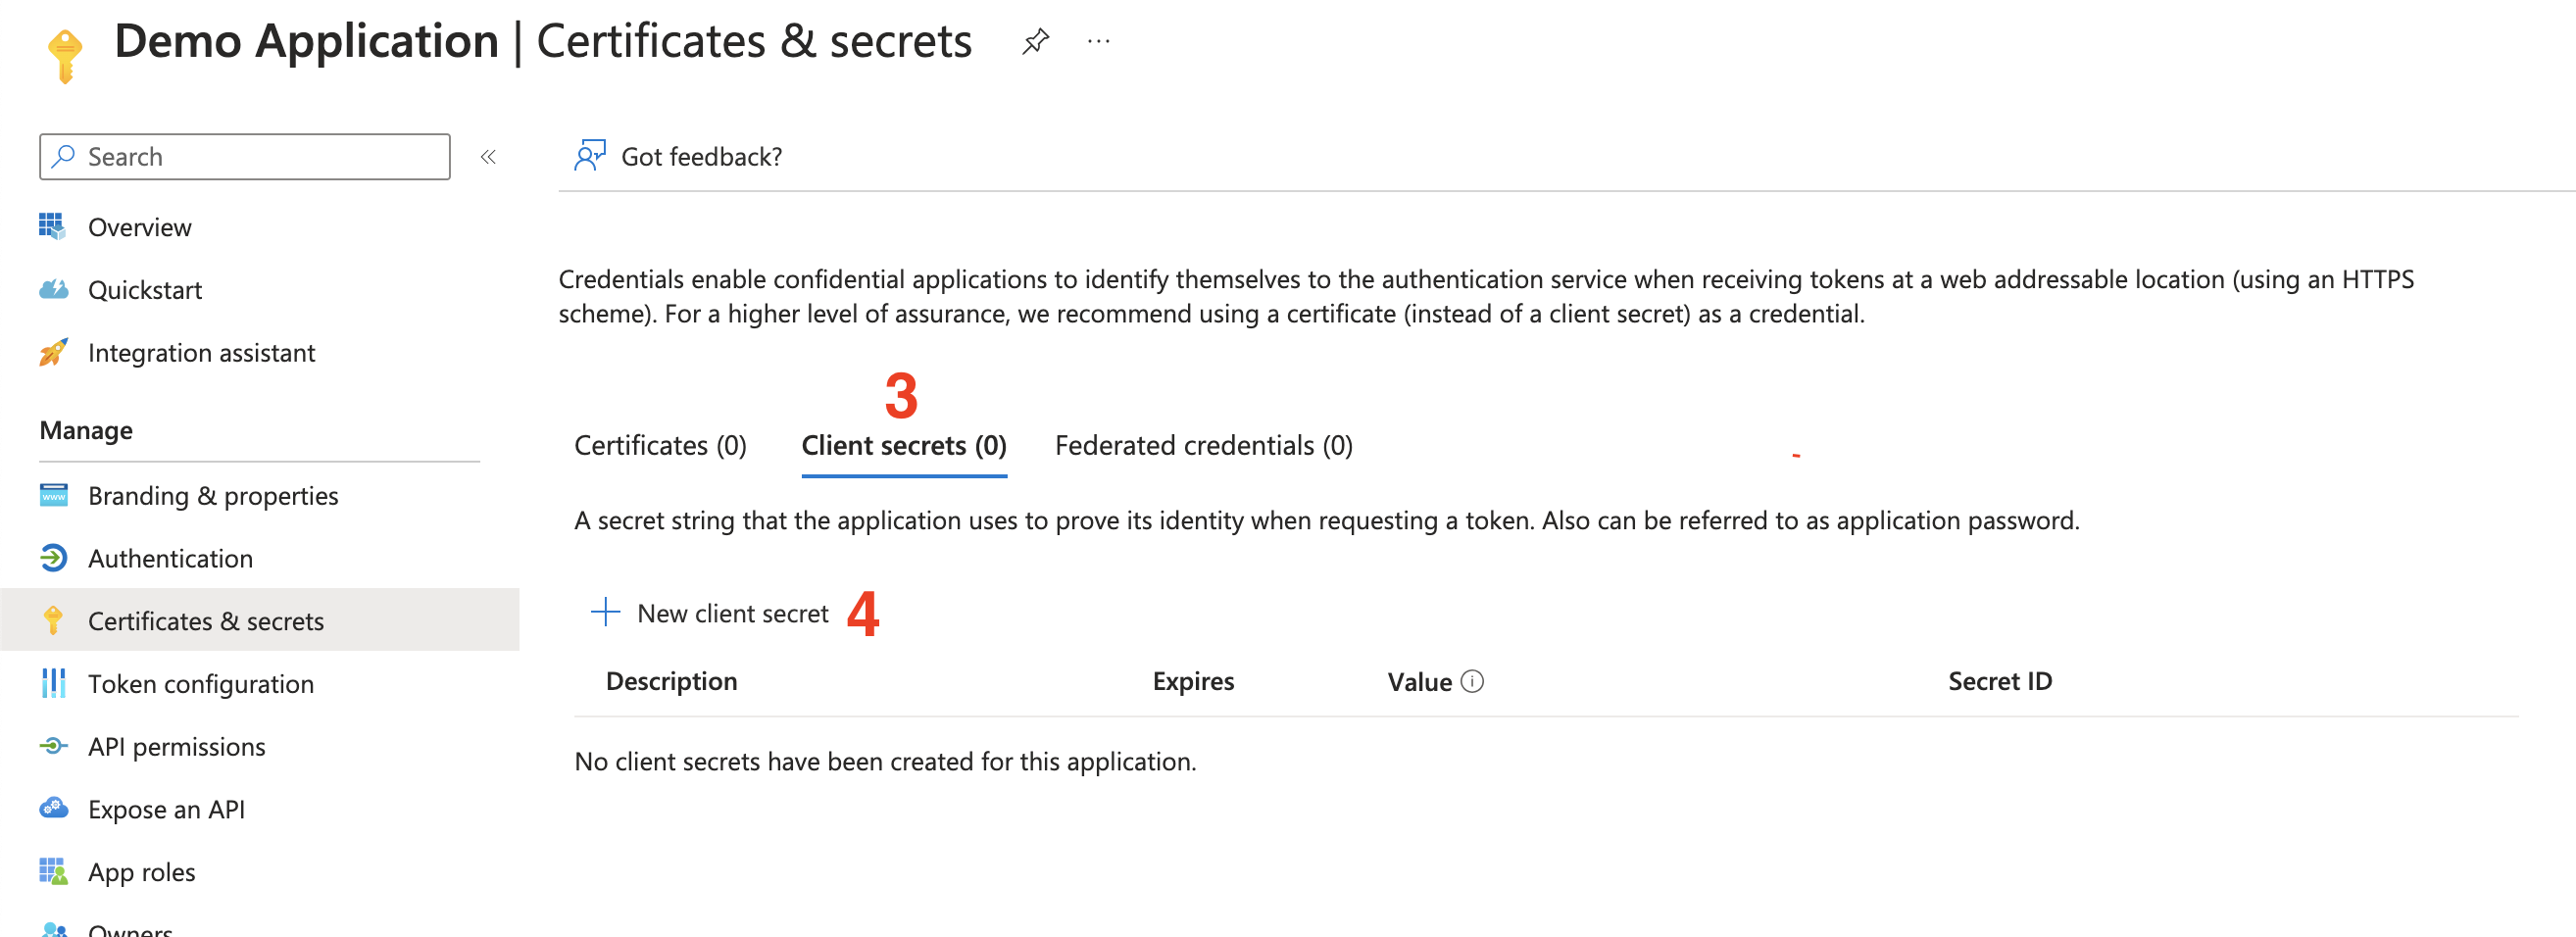
- Select the
Client secretstab.
- Select
New client secret.
- Give your secret a name.
- Select an expiration date.
- Click
Addto create the secret.
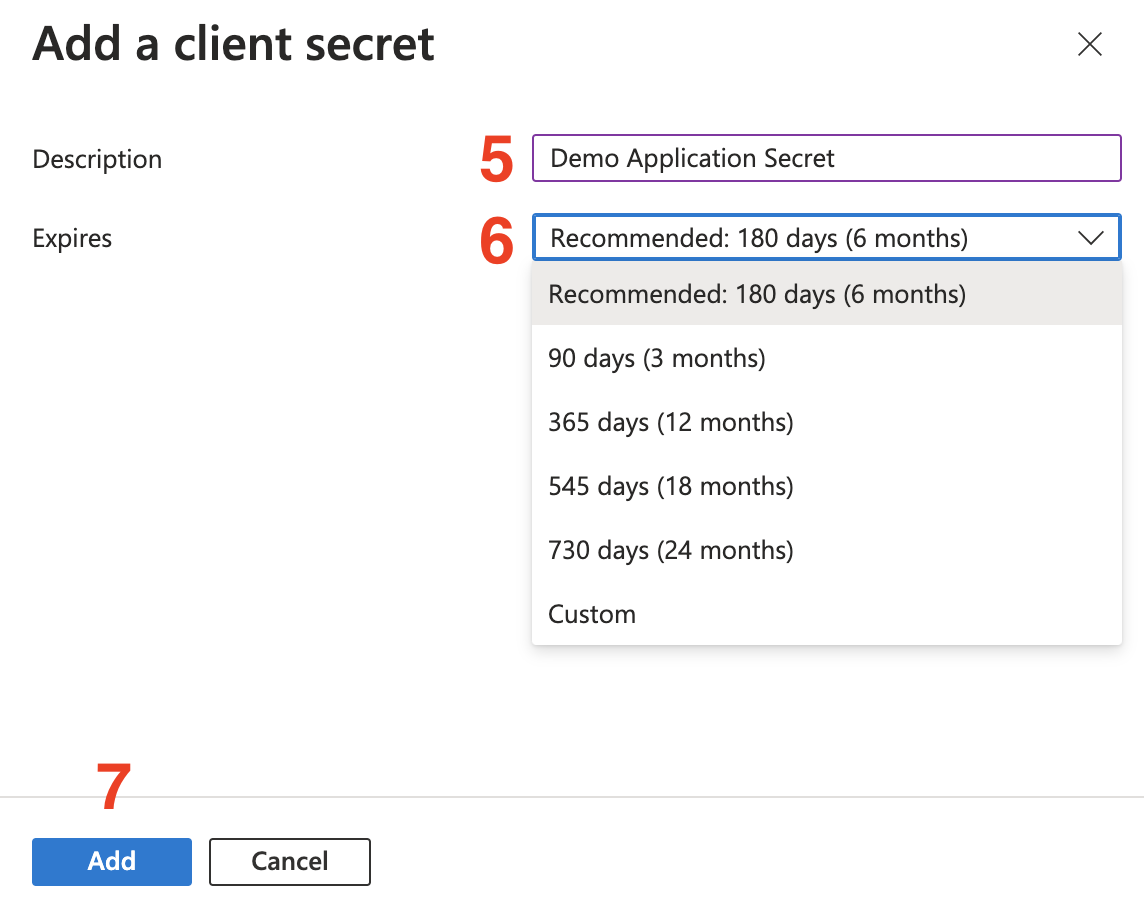
- After creating the secret, make sure to copy the secret
Value. You will need this when configuring your credentials with Hanko.
You can no longer copy the
Value of the secret after a full page refresh. If you you forget to do so, simply
create another secret and remove the old one.Token configuration
Next, we recommend making some additional adjustments to the claims containend in the tokens handed out by Microsoft.Add UPN claim
It is possible that users do not have a primary email address set but Hanko requires email addresses to create accounts. To ensure Hanko is provided with an email address, set the optionalupn
(UserPrincipalName)
claim. In general, the upn domain suffix cannot be changed to an unverified domain and hence the upn will be
prioritized over a users’ email (see the next section). To configure
the claim:
- Select your app registration and then select the
Token configurationsection.
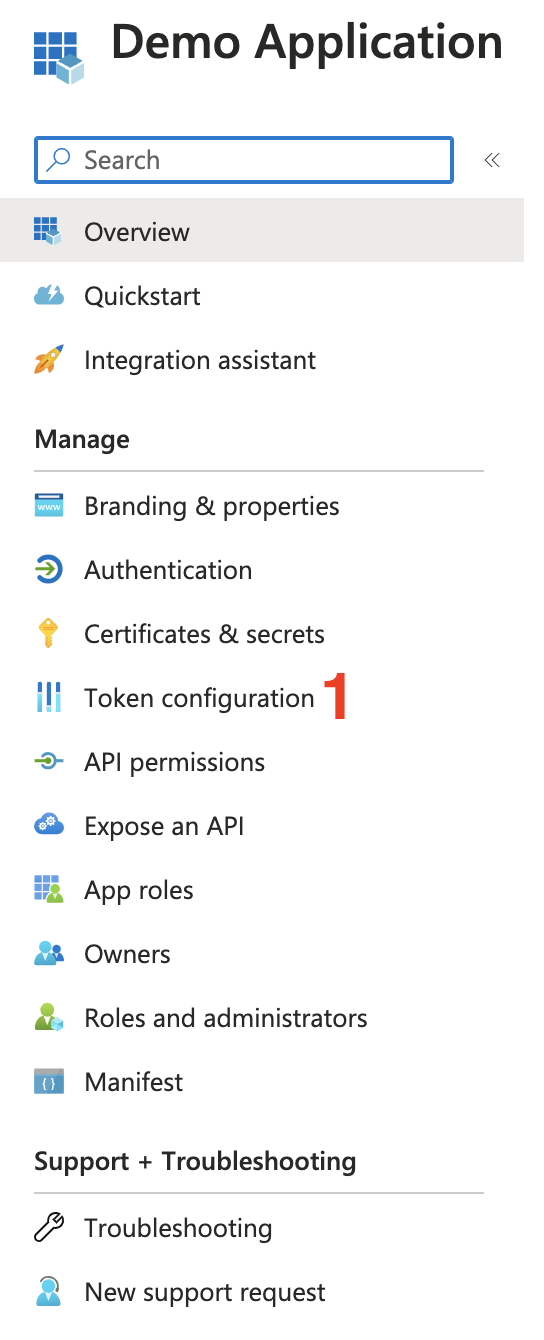
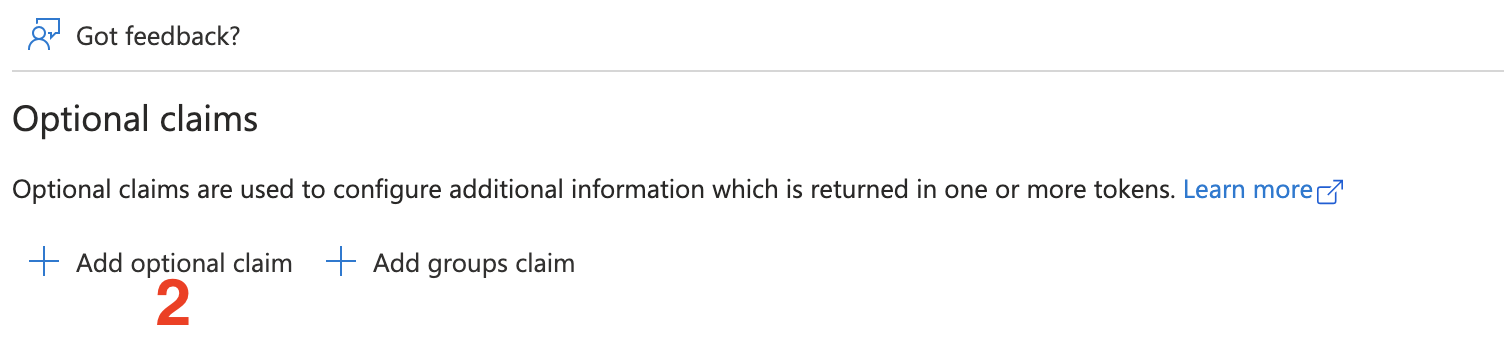
- Select
Add optional claim.
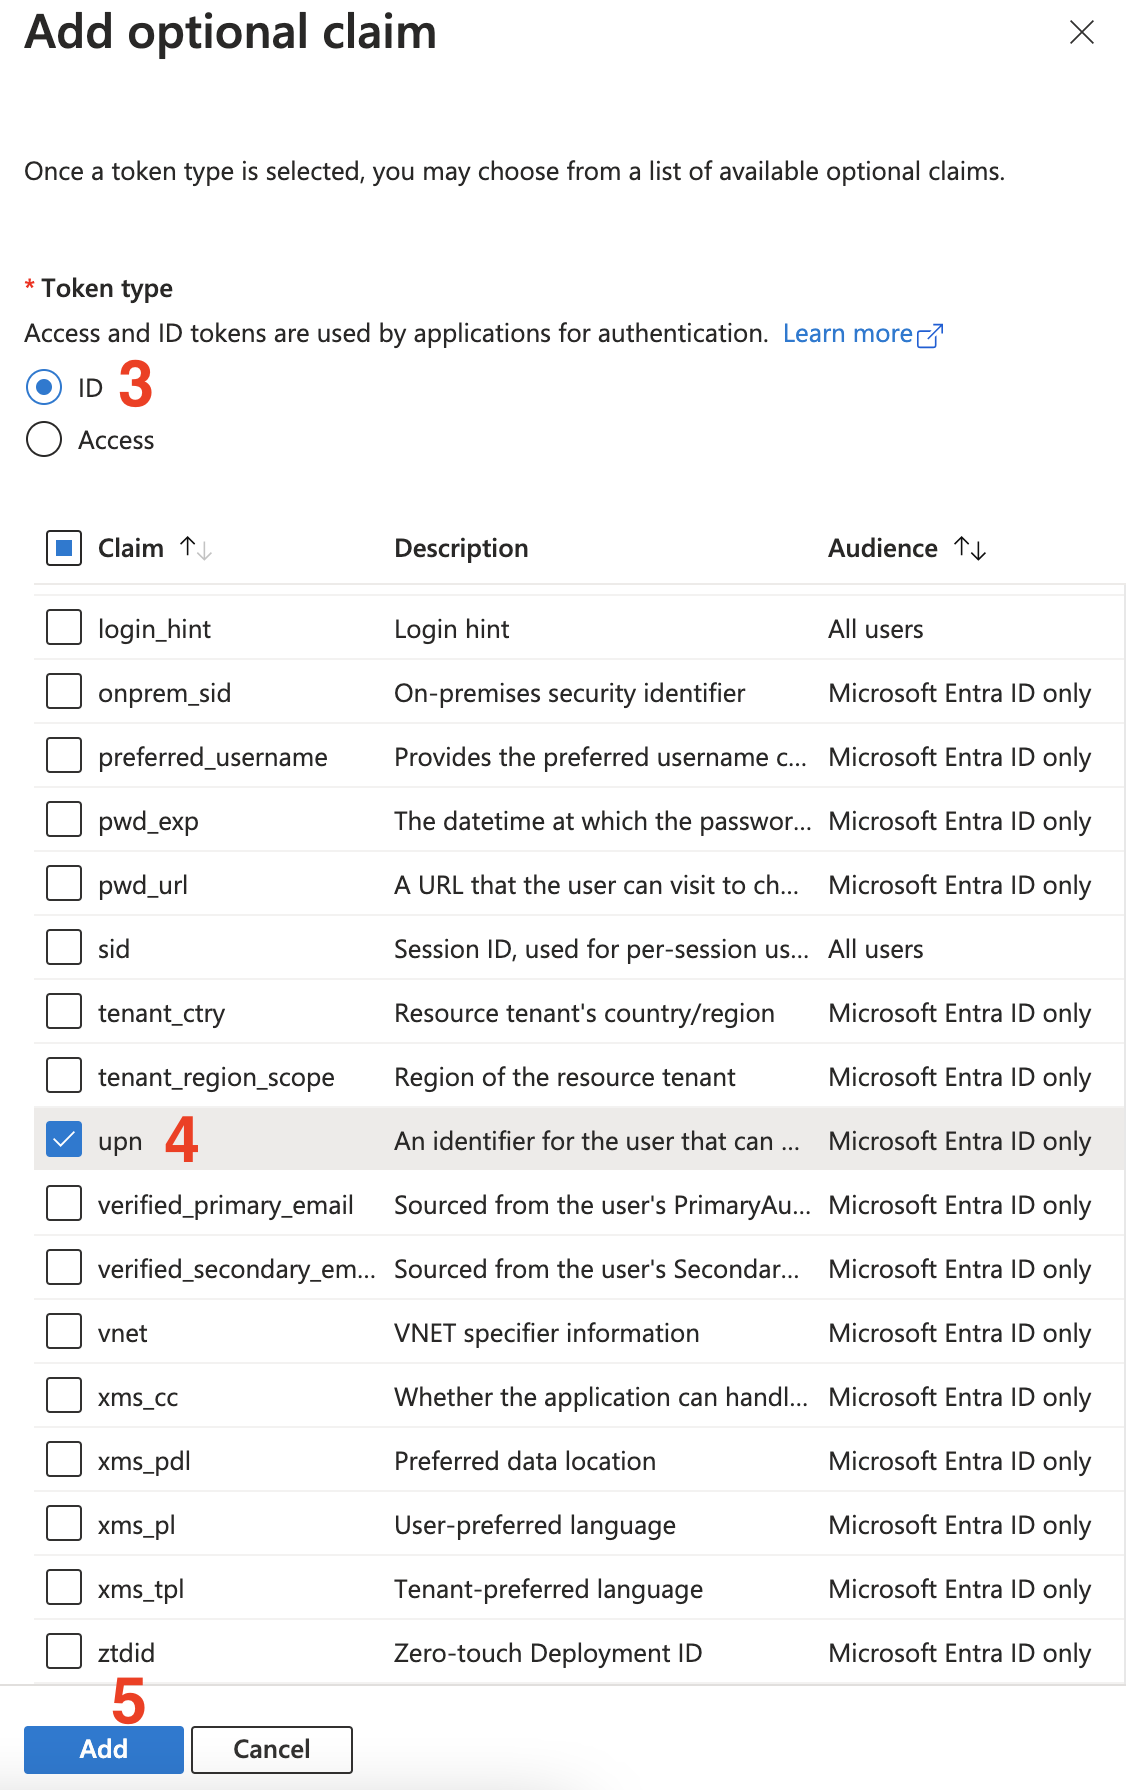
- Select
IDas the token type. - Tick the
upncheckbox to select it as an additional optional claim. - Click
Add.
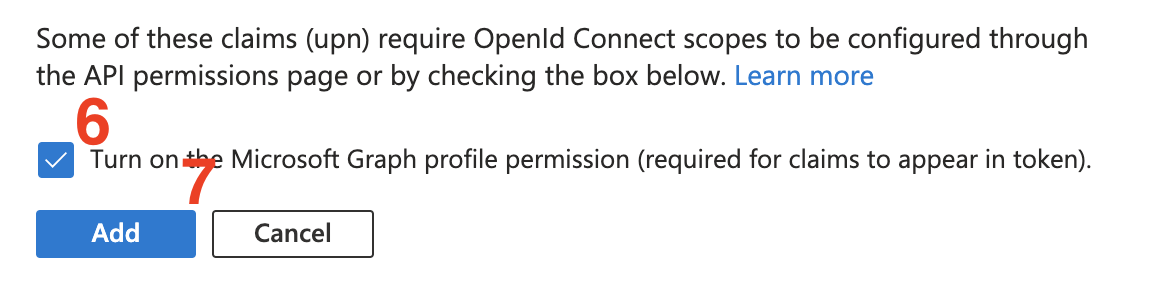
- Tick the checkbox to set the required Microsoft Graph permissions.
- Click
Add.
Protection against the nOAuth vulnerability
In 2023 Descope discovered a vulnerability resulting from misconfigurations of multi-tenant apps that could potentially lead to account takeovers when linking accounts with the provider (automatic account linking is not activated by default in Hanko, but may be preferable in many situations). To mitigate this vulnerability Microsoft provides the following guidance:- Configure the
authenticationBehaviorssetting of your application to disallow unverified email domains. This should be the default case for newly created applications, so no further steps should be required.
If your application was created before the publication of the vulnerability, and the application previously used
unverified emails, you might need to manually alter the
authenticationBehaviours as described
here.- Use the optional
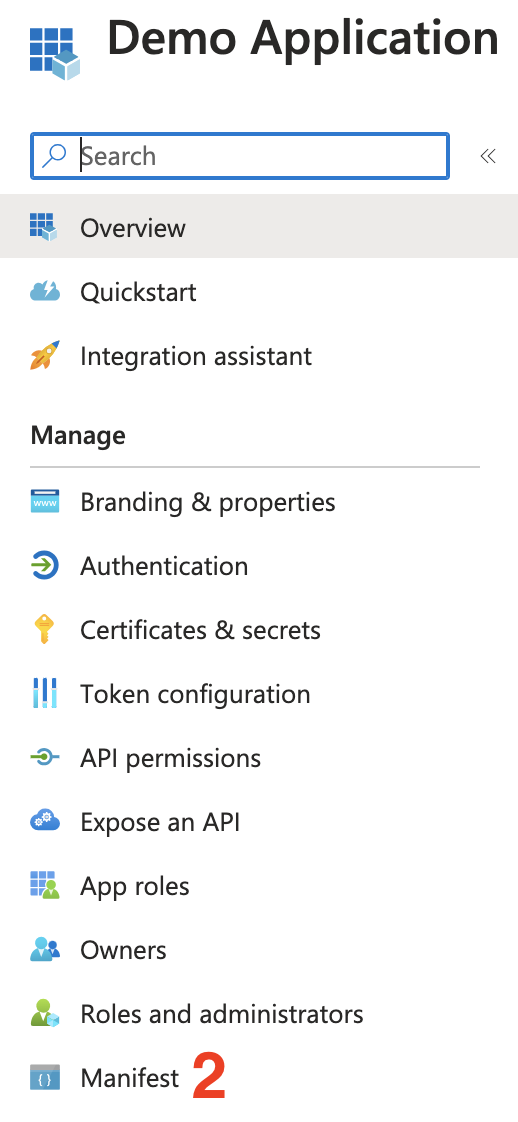
xms_edovtoken claim to check if an email domain owner has been verified. We recommend implementing this additional security measure in case the tokens do not contain aupn(e.g. if the claim has not been configured or the configuration has been reverted) and decisions have to be based on a users’emailproperty. To do so, first open your applicationsManifest.
- Find the
optionalClaims.idTokenkey in the manifest. It should already contain an entry for theupnclaim you configured in the previous step. Add an entry for thexms_edovclaim to the array (make a backup of the manifest file, just in case):
You may notice that after adding the
xms_edov claim, it is listed in the Token configuration section but it is
marked with a warning icon claiming that “[t]his claim is not supported and will not be returned in the token”.
At the time of writing this does not appear to be correct and the claim is in fact returned in the ID token.- Add another optional claim, only this time add the
emailclaim. Proceed just as described in the previous section when you added theupnclaim.
xms_edov claim, Hanko will reject any attempt at
connecting a Microsoft account if no verified email address is provided.
Configure credentials with Hanko
- In the Hanko Cloud Console, navigate to your project
Settingsand selectIdentity providers. - Configure the following:
-
Error Redirect URL: This is the URL target in your frontend the Hanko API redirects to if an error occurs during third
party sign-in. If your frontend uses the
hanko-elementsweb components, this URL should be the URL of the page that embeds the web component such that errors can be processed properly by the web component. -
Allowed Redirect URL: This is the URL target in your frontend the Hanko API is allowed to redirect to after third party
authentication was successful. If your frontend uses the
hanko-elementsweb components, this URL should be the URL of the page that embeds the web component.The allowed redirect URL supports wildcard matching through globbing:https://*.example.commatcheshttps://foo.example.comandhttps://bar.example.com.https://foo.example.com/*matches URLs likehttps://foo.example.com/page1andhttps://foo.example.com/page2.- Use ** to act as a super-wildcard/match-all.
- In the
Providerssection, selectMicrosoftand use theEnable providertoggle to enable the provider. - Provide the
Client IDandClient Secretyou obtained in one of the previous section in the remaining inputs. - Click
Save.
Frontend integration
To enable a login with Microsoft in your frontend application we recommend using either our pre-built UI as provided by the@teamhanko/hanko-elements package or building a custom UI using
the @teamhanko/hanko-frontend-sdk.
- Hanko Elements
- Hanko Frontend SDK
We recommend following one of our quickstart guides to integrate
the On successful authentication with the provider, the backend issues a session cookie and the web component
continues the usual component flow on success. Errors that occur during third party
provider authentication are also picked up and displayed in the web component accordingly.
<hanko-auth> component from our @teamhanko/hanko-elements package in your frontend application .
On successful integration, the component will display a button for signing in with Microsoft in the login view
of the component.Make sure to configure the page the web component is embedded on as your
error redirect URL as well as an
allowed redirect URL (see the previous step).